How to Track Which Newsletter Sends Signups and Revenue
Learn how to tag newsletter links, track signups, and attribute revenue to the exact email that drove each visit, conversion, and sale.

NoirTrack team·Follow

Tag every newsletter link with a unique campaign name, then connect signups and payments back to that visit so you can rank emails by conversions and revenue. Tracking which newsletter sends signups and revenue means tagging each send, then matching that source to a signup or payment event. In practice, one clean UTM scheme plus goal and revenue tracking is enough to see which newsletter performs best. This only works if your links stay tagged and your signup or payment event is recorded consistently.
If your newsletter sends traffic but you cannot tell which issue actually drives signups or sales, you are missing the last mile of attribution. The fix is simple: give each email a unique campaign tag, then measure signups and revenue against that source instead of guessing from opens or clicks.
This post shows the exact setup, the metrics to watch, and the common mistakes that make newsletter attribution look broken. By the end, you will know how to track which newsletter sends signups and revenue without guessing.
How do you track which newsletter drives signups and sales?
Track which newsletter sends signups and revenue by giving each send its own campaign name, then measuring the signup and the sale as separate outcomes. NoirTrack reads UTM parameters on the link, groups visits by source and campaign, and matches revenue back to the visit that brought it in, so one issue can be compared with another on the same dashboard. See the tagging rules in /docs/tracking-parameters and the revenue match flow in /docs/revenue-attribution.
Use one naming scheme for every send
Keep utm_source and utm_medium stable across every email you send, then change utm_campaign for each issue. That gives you one source bucket for email and one campaign bucket per newsletter, which keeps the report readable when you look back at a month of sends.
Use the same pattern every time, such as newsletter_2026_10_10_launch or newsletter_2026_10_10_vip. If you send the same offer to two lists, split them into separate campaign names so a segment with 400 clicks does not hide a segment with 40 clicks.
A bare link in the same send weakens the report because the untagged visits fall back into Direct or Unknown. A tagged link like this keeps the source clean:
https://yoursite.com/pricing?utm_source=newsletter&utm_medium=email&utm_campaign=october_launch
If you want a deeper breakdown by audience, add utm_content for the variant or segment name. The UTM guide in /blog/utm-parameters-guide shows a simple pattern you can reuse.
Measure the two outcomes that matter
Track the signup as a goal, then track the sale as revenue. Goals turn the visit into a conversion rate, and revenue turns the same visit into money, which lets you rank the same newsletter by both steps. Set the signup up in /docs/goals and connect sales through /docs/revenue-attribution.
A practical readout looks like this: an issue gets 120 clicks, 18 signups, and 3 paid customers. Another gets 90 clicks, 24 signups, and 1 paid customer. The second issue wins on signups, but the first one brings more revenue, so it gets the better score if your goal is paid growth.
Keep clicks, signups, and revenue in the same view before you decide what to send again. That makes it easy to spot newsletters that attract curiosity but do not turn into customers.
What UTM tags should a newsletter link use?
A newsletter link should use three stable tags: utm_source for the newsletter name, utm_medium=email for the channel, and utm_campaign for the specific send. That pattern gives each issue one clear label, so NoirTrack can group the visit under the right source and campaign, then show the revenue tied to it in the Sources card and campaign reports. If you want a deeper reference on the tag parts, see /docs/tracking-parameters or the shorter UTM parameters guide.
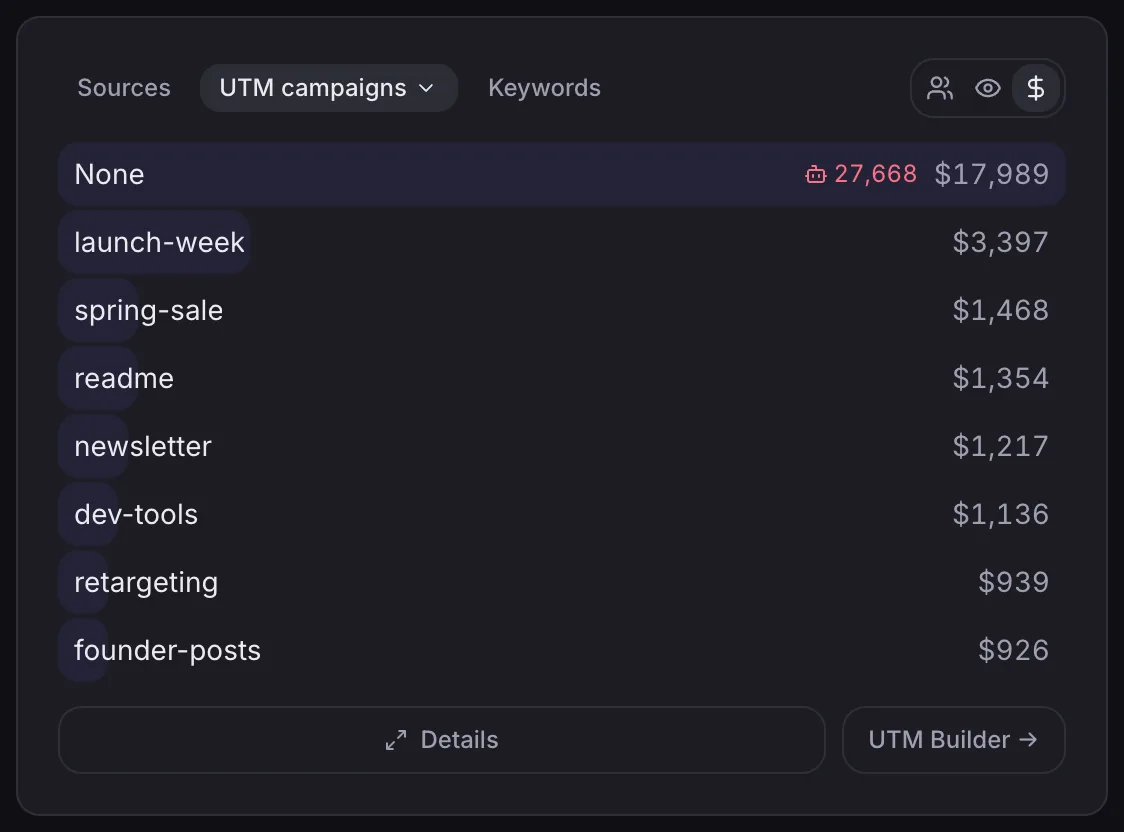
A simple tag pattern that works
Use one source value for the whole newsletter brand, one medium value for every email, and one campaign value that changes per send. For example, a March product update could use utm_source=weekly_digest&utm_medium=email&utm_campaign=2026-03-product-update.
That gives you a link like this:
https://yoursite.com/pricing?utm_source=weekly_digest&utm_medium=email&utm_campaign=2026-03-product-update
Keep the source value steady across the whole list. Keep the medium value steady across every newsletter link. Change the campaign value for each issue, date, or topic so one send does not get mixed with another. NoirTrack reads these parameters automatically and groups visits by source and campaign, so the same pattern keeps your reports readable as the list grows.
What to avoid in your tags
Do not give every newsletter link the same campaign name. If every send uses utm_campaign=newsletter, you cannot tell one issue from another, and the campaign report turns into a pile of merged clicks with no useful split.
Do not vary the same issue with different spellings or case. March-Update, march_update, and March Update become separate campaigns, so one send gets split into three rows. Pick one format, write it the same way every time, and keep it lowercase with hyphens if you can.
Do not judge revenue from opens. Opens tell you that an email loaded, but they do not show which click led to a signup or purchase. Use the tagged click, then check the linked outcome in revenue tracking or filter to one campaign with dashboard filters.
If you want a simple rule, use one source, one medium, one changing campaign. That is enough to compare newsletter sends without adding extra tags that you will not use.
How do you connect a signup to the newsletter that caused it?
Track the signup action as a goal, then read it by source or campaign so you can see which newsletter produced the conversion. NoirTrack groups visits by UTM parameters, and its Goals view lets you break conversion rate down by source and campaign, so one tagged newsletter send can be compared with another without a separate report. If the signup finishes on a later page, the original tagged source still needs to follow the visitor through the flow until the goal fires.
Track the signup event once
Fire one goal when the visitor creates an account, joins a list, or completes your main lead action. Use the same goal name for every newsletter so each send gets measured against the same outcome. If one send gets 120 visits and 9 signups, and another gets 80 visits and 8 signups, you can compare the rates directly instead of guessing from clicks.
- Pick the final success event. Track the moment the signup is complete, such as the account creation confirmation or the thank-you page, not the first button click in the form.
- Use one goal name. Keep the goal stable, such as
signup, so every newsletter rolls into the same conversion metric. NoirTrack supports event goals and page goals, and both count toward conversion rate in the dashboard. See /docs/goals for the ways to fire one. - Keep the source attached. If the user signs up after a multi-step form, make sure the original tagged visit is still available when the final goal fires. That is what ties the signup back to the email campaign.
A simple HTML example looks like this:
<button data-noir-goal="signup">Create account</button>
That records the same signup goal every time the button is clicked, so the campaign report stays clean.
Use filters when you want one newsletter
Filter the dashboard to one campaign when you want to inspect a single send in detail. Click the newsletter campaign value in Sources, or apply a filter for that campaign, and the whole dashboard narrows to that slice. NoirTrack also lets you save the view as a segment, which helps when you check the same weekly send or promo series again later. See /docs/filters for include and exclude filters.
A saved segment is the fastest way to revisit one newsletter without rebuilding the view. If you keep a monthly promo series in utm_campaign=launch, save that filter once and reopen it for each send. That keeps the comparison on one screen and cuts out the hunt through raw logs or spreadsheets.
How do you tie newsletter clicks to revenue?
Connect your payment provider once, then let NoirTrack match each sale back to the visitor who clicked the newsletter link. When the payment lands, the sale can carry source, campaign, and revenue in the same report, so you can see which send produced buyers and which send only drove visits. If you want the full setup behind that match, see how revenue tracking works.
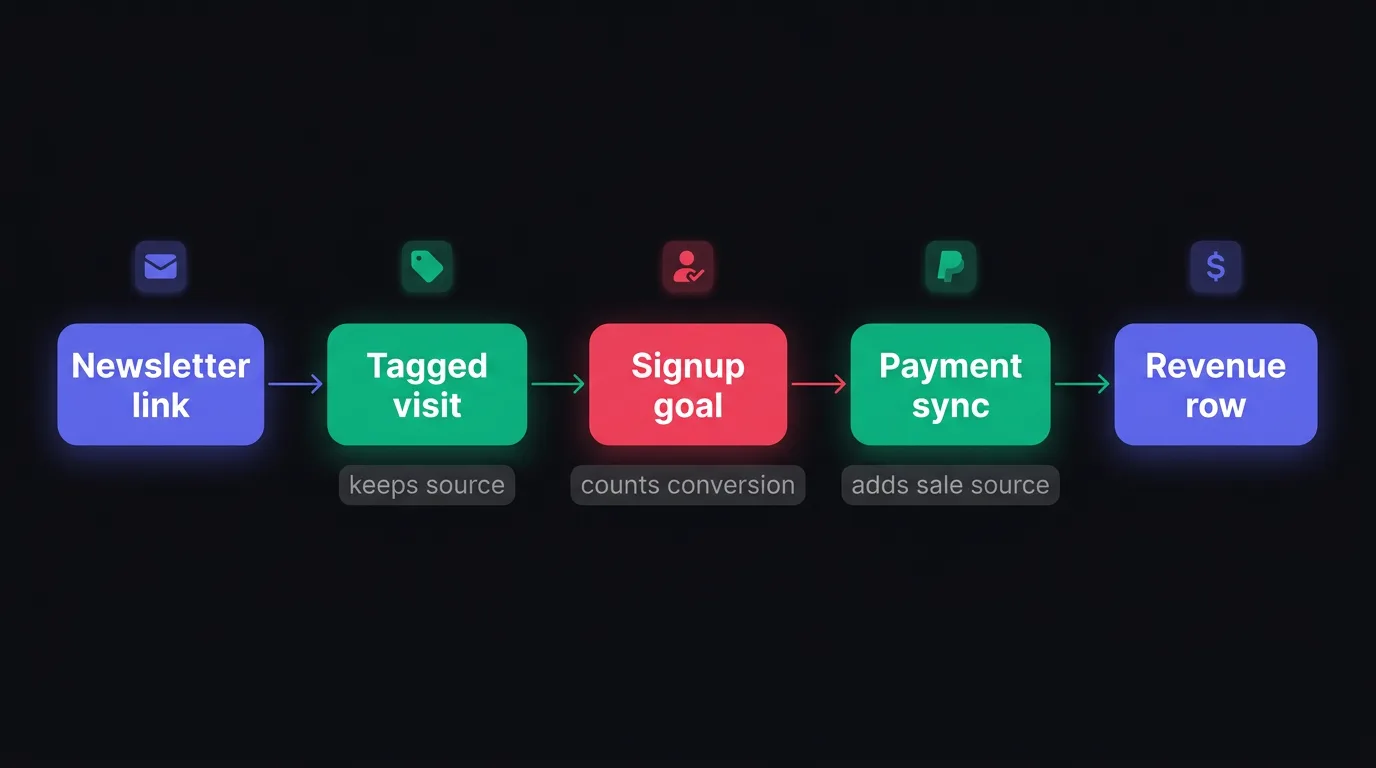
Compare newsletter performance in one table
Compare sends in one table with revenue next to conversion rate. A newsletter with 120 visits and $900 in revenue can beat one with 300 visits and $300 in revenue, because the smaller list brought higher-value buyers. Use the Transactions view when you need to check one sale at a time and confirm the source and campaign attached to it.
| Send | Visits | Signups | Revenue | Conversion rate |
|---|---|---|---|---|
| Product update | 120 | 18 | $900 | 15% |
| Feature roundup | 300 | 21 | $300 | 7% |
That table keeps the tradeoff visible. The first send converts better and earns more per click, even with fewer visits. The second send brings more total traffic, but it does less for revenue.
A simple workflow keeps the numbers clean:
- Tag the link. Add a stable
utm_source=newsletterand a send-specific campaign value to every email link. NoirTrack groups those visits automatically from the UTM tags in the URL. - Record the signup once. Fire one signup goal, either from the browser, a page goal, or your server. That gives you conversion rate for the same send you tagged in the link.
- Check revenue by campaign. Open the campaign view and compare revenue against signups. If one campaign brings fewer signups but more money, that is the one to keep.
If you need to narrow the view to one send, click the campaign value and apply a filter. The dashboard updates to that slice across visits, signups, and revenue, which makes a one-send review fast. See filters and segments.
The signals to trust most
Source tells you where the visit came from. Campaign tells you which email send it was. Revenue tells you whether that send paid off. Use all three together, and track which newsletter sends signups and revenue becomes a report you can read in one minute instead of a spreadsheet you have to reconstruct.
What is the fastest way to set this up for a live newsletter?
Pick one send, add UTMs, and check that the visit lands under that source before you touch the rest. Then connect the signup goal and revenue so the same send can be judged by signups and sales. If you want alerts, add them after those pieces work.
Do this in order
- Tag one link. Use the pattern in /docs/tracking-parameters and confirm the click appears in Sources.
- Track the signup. Add a goal for the signup action in /docs/goals.
- Connect revenue. Link your payment provider so the same visitor can be matched to a sale in /docs/revenue-attribution.
- Check the send. Open Sources and Transactions after the next campaign.
When this method does not help
If every link is untagged, visits fall into Direct or Unknown. If signup happens on a different site or app, send that event into NoirTrack or your backend. If you only care about opens, stop at link tagging.
Questions, answered.
The best way to track which newsletter sends signups is to tag each newsletter link with a unique campaign name, then track the signup as a goal and compare conversion rate by source and campaign. Use one naming pattern across every send so the same newsletter always lands in the same row. That lets you compare sends by signups and see which subject lines or issues drive the most form completions.
Newsletter revenue attribution usually takes one tagging pattern, one signup goal, and one payment connection. After that setup, the same tracking can report each send automatically. The work stays small because you only define the source once, then let the analytics map future signups and revenue back to the campaign name.
Newsletter tracking is different from click tracking because click tracking only tells you who opened or clicked, while attribution connects that click to a signup or sale. Click data shows interest. Attribution shows whether the newsletter made money, which is the number that matters when you compare sends or justify the cost of writing and sending them.
The most common mistake with newsletter UTM tags is using inconsistent or missing campaign names. That splits one newsletter across multiple labels or drops traffic into Direct or Unknown. A fixed naming pattern keeps every send together, so you can trust the row totals when you compare signups and revenue.
Yes, you can track one newsletter against another newsletter series by giving each series or send a distinct campaign name. Then compare the campaign rows by signups, conversion rate, and revenue. That shows which series brings the best readers, not just the most clicks.
Try NoirTrack
See which traffic actually pays.
Analytics with revenue attribution and a built-in bot firewall. One script tag, live in two minutes.
Free 14-day trial, no credit card
Written by NoirTrack team
The privacy-first Google Analytics alternative with a built-in bot firewall and revenue attribution. See which traffic makes you money, no cookie banner.


